


How To Add Lining To Ready–Made Curtains
How To Add Lining To Ready–Made Curtains
You’ve bought a beautiful set of curtains, however once you hang them you find they’re a little too sheer, draughty or don’t block enough light during the night time. This can be a common issue for children’s bedrooms, especially when they’re heading to bed and that evening summer sun is still shining brightly. So you might be wondering how easy is it to line ready–made curtains? Adding a curtain fabric lining will mean you can keep the curtains you love – whilst ensuring a more comfortable room environment. A curtain lining fabric not only helps to block the light, it will also prevent heat loss during the winter and help your curtains to drape better.
You might imagine that adding a curtain lining fabric will be a lengthy, tricky process but it can be achieved relatively easily and quickly. To help you, we’ve put together the key steps to guide you through the process of how to line ready–made curtains. If you’re making your own curtains too, check out our guide "how much fabric do I need for curtains", which will help you calculate your curtain fabric order.

How To Choose The Right Curtain Lining Fabric
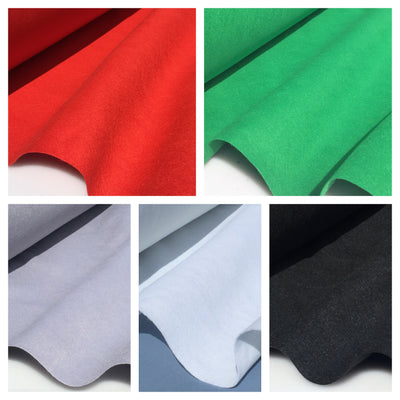
The beauty of adding your own lining to ready–made curtains is that you can also choose the right type of lining for the room. Our selection of fabric for lining curtains offers you the best options to complement the style of your ready–made curtains as well as the practical qualities you’re looking for. To choose the right curtain fabric lining, consider what you’re hoping to achieve – do you need to cut out all outside light? Do you want to reduce heat loss? Or do you just need to increase the opacity of your curtains and help them drape better? Also look at the weight and style of your curtain fabric – can you add a substantial black out curtain lining fabric? Or, if your curtains are quite sheer and light–weight, do you just need a plain weave lining to reduce the curtains’ transparency? Also take a look at the care instructions for your curtain lining fabric – do they match your curtain? If your curtain fabric is washable, do you want your lining to be machine washable too or are you happy with dry clean only?
Let’s take a look at the different fabric lining for curtains you can choose from:
- 3 pass black out curtain lining fabric: If you need to ensure complete darkness and prevent heat loss, you can use our 3 pass thermal blackout curtain lining fabric. Combining black out technology with thermal benefits, this 3 pass thermal black out curtain lining is a well-recognised industry standard – being used for hotel curtains and ideal for shift workers and children’s bedrooms.
- Dim out curtain lining fabric: Our dim out curtain lining fabric will reduce outside light, providing another option if outdoor light is an issue for your room. At 230gsm, this quality curtain lining fabric will add weight so your curtains drape well and help to prevent heat loss too.
- Plain weave curtain lining fabric: If the ready-made curtains are a light–weight fabric and you’re looking to reduce transparency, our plain weave curtain lining will be a great option to suit your fabric, adding more density & weight to your curtains. In an ivory colour, this plain weave curtain fabric is a classic curtain lining to complement all kinds of fabrics and styles.

Our Sample Service:
Not sure which curtain lining fabric is best for your project? Our sample service can help. Add the samples to your basket and let us know which fabrics you need. We’ll send you a 5cm strip of the full width of your chosen curtain lining fabrics. Read more about our sample service here!
How To Line Shop Bought Curtains
To complete the project, you’ll need:
- Your shop bought, ready–made curtains
- Curtain lining fabric to suit your needs
- Sewing machine
- Tape measure
- Fabric marking pen
- Fabric ruler
- Fabric scissors
- Pins
- Matching thread (match your thread to your curtains).
You’ll need to clear a nice big space – ideally a floor space so you can lay your curtain fabric flat and move around easily, without disturbing your work.
Let’s get started! Here's our 10 easy steps to line a ready–made curtain –
1: Lay your curtain flat on the floor, with the back of the curtain (where you want the lining to go) facing up and the top of the curtain (that sits on the curtain rail) towards you.
2: We start by measuring the area you need to cover with your curtain lining fabric. To do this, use a good quality tape measure then start by measuring from the left hem to the right hem of your curtain. Note down these measurements for the width of your lining.
3: Next we’ll measure the length or drop of your curtain lining fabric. At the top of your curtain, you’ll need to measure from the bottom of the rod pocket or pleats to the bottom of your curtain. Note down these measurements for the length or drop of your curtain fabric lining.
4: Add about 6 cms to your length measurement and 5 cms to your width measurement, allowing for the seams to your lining.
5: Next lay your curtain lining fabric down on a separate work surface or floor space to cut your piece to size. Make sure your lining is flat and taut – if you’re working on a tiled or wooden floor, adding some masking tape to the corners of your lining fabric will help.
6: Using a tape measure, a fabric ruler and a fabric pen, measure and mark the back of the lining according to your measurements. Take your fabric scissors and carefully cut your lining along your line.
7: Now let’s start to prepare your lining. Turn the top edge over by 3 cms, turning on to the wrong side of your lining, pin with straight pins and then press to hold neatly in place. Repeat this step with the bottom edge, folding over by 3 cms, pinning and pressing neatly. Fold over the side edges of your lining fabric by 2.5 cms on each side, pinning and pressing the edges so smooth and tidy.
8: Using your sewing machine, stitch all the hemmed edges and remove all pins once completed.
9: Now let’s bring your curtains and your lining fabric together! Carefully lay your curtain lining fabric on top of your curtains (remembering that your curtains are lying face down so that the lining will be attached to the back of your curtains). Keeping your lining and curtains as smooth and straight as possible, pin the two fabrics together using straight pins every 4-5cms around the edge of your lining fabric.
10: With a thread to match your curtains, stitch the two fabrics together along the top & side edges on your sewing machine. We recommend stitching the seams twice to add durability and strength to your curtains. You can leave the bottom edge of your lining unattached to the curtain so the curtain hangs neatly. Now all you need to do is hang your drapes and enjoy your new, fully lined curtains!

Making Your Own Curtains? We Can Help!
If you’re making your own curtains, check out our guide “how much fabric do I need for curtains?” where we’ll take you through the steps to calculating your curtain fabric. To help with your curtain projects, we also have a dedicated curtain making section on our website, that includes everything from curtain tassels to curtain weights. Our haberdashery section includes all the tools you require from specialist machine needles to threads, tape measures, scissors and much more!
If you need a little help finding what you need, we’ll be happy to help! You can chat to us via the live chat service on the website, call our landline or drop us an email.
Leave a comment